How to Connect to Your WordPress Subscribers
This guide assumes that you have already installed a MyODBC Driver onto your computer, added MySQL Access hosts, and created a User DSN for MySQL driver. If you haven’t, read the instructions how to do it in this tutorial.
In this guide we’ll demonstrate you how you can create a link from G-Lock EasyMail address book to your WordPress database where you maintain subscribers collected by WP Double Opt-In Widget. The subscribers will be displayed in G-Lock EasyMail address book so you can send an email to them without the need to export-import the list.
To create a link to your WP subscribers database, follow these steps:
- Open G-Lock EasyMail v6
- Click on the Address Book button on the toolbar
- Click on New Link to Database icon
- Type a name for your database link (for example, WP Subscribers)
- Click Select Database button
- On the Data Link Properties screen select Microsoft OLE DB Provider for ODBC Drivers
- Click Next
- Select your data source name (in our example, glockeasymail.com)
- Click on Test Connection button
- Click OK if the test passes
- Click OK to close the Data Link Properties screen
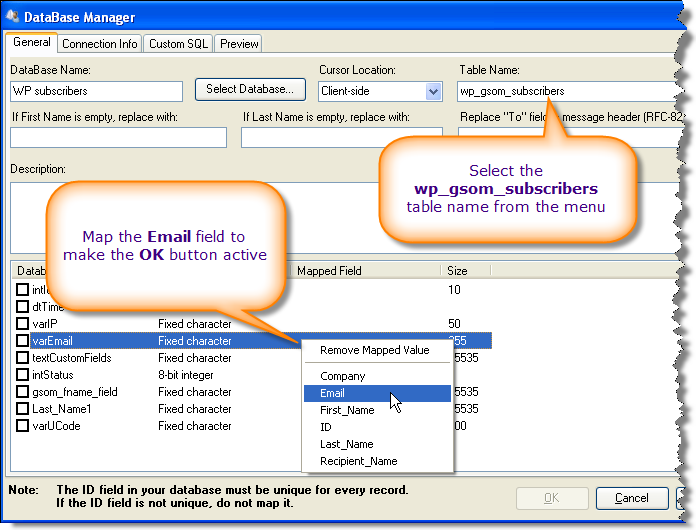
- On the Database Manager screen select the Table Name – wp_gsom_subscribers
- Map the Email field to make the OK button active. To do this, click the mouse in the Mapped Field column for the varEmail database field and select Email from the menu.
- Click on Custom SQL tab in the Database Manager
- Check Use your own SQL statement option and paste the SQL text below to select CONFIRMED subscribers from your WP database
Select Distinct varEmail as Email,
        gsom_fname_field as First_Name,
        Last_Name1 as Last_Name,
        dtTime as Subscription_Date,
        varUCode as varUCode
 From wp_gsom_subscribers
 where intStatus = 1
 Group By email
In the lower pane paste this SQL text to calculate the subscribers selected from WP database:
Select count(*) From wp_gsom_subscribers where intStatus = 1
The SQL query we provide as an example selects all the subscribers from your WP database who confirmed their subscription (i.e.have intStatus = 1 in the WP database). If you want to only select subscribed but not confirmed users, or unsubscribed users, use the respective intStatus field value in the SQL query.
The intStatus field values:
0 – subscribed but not confirmed users
1 – confirmed users
2 – unsubscribed users
If you renamed the default fields in your WP Double Opt-In plugin settings, be sure to replace the default database field names in the SQL text with your custom field names. To do this, click the right mouse button and select Database Fields -> [custom field name]. The correct field will be inserted into the SQL text.

Click on Preview tab, then click on Preview button to see how the subscribers are displayed.
If everything is correct, click OK to save the settings.
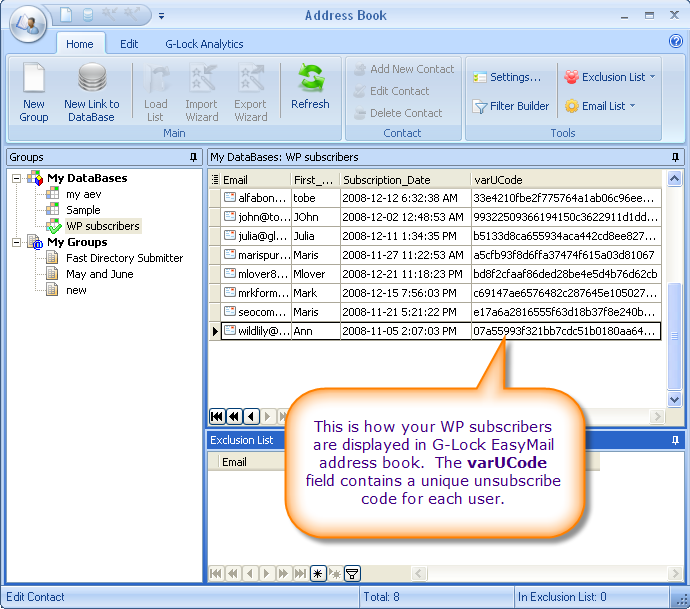
Success! You created a link to your WP subscribers database from G-Lock EasyMail. To see how the subscribers are displayed in G-Lock EasyMail address book, put the cursor on your link name in My Databases section at the left pane.
You will notice a unique varUCode field for each subscriber. This field stores a unique unsubscribe code that you can merge into your unsubscribe link.
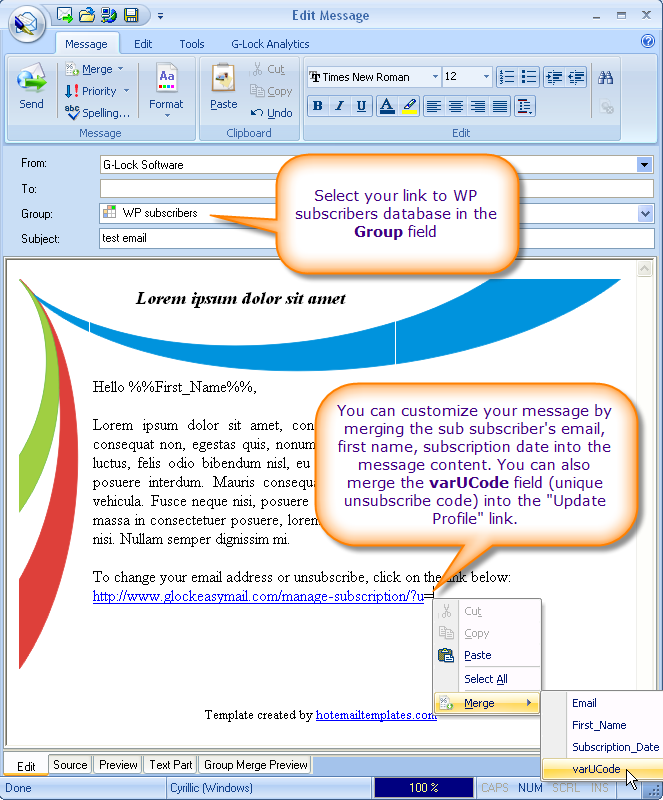
Now you can send an email to the subscribers stored in your WP database. Select your link to the WP database in the Group field, create an email and click Send. You can customize the message by merging the subscriber’s details into the email: email address, first name, last name, subscription date, and unique unsubscribe code (varUCode).
You can merge the varUCode field into your “Update Profile” link to let people change their email address or unsubscribe from your list.
Example:
glockeasymail.com/manage-subscription/?u=%%varUCode%%