Manage Subscribers
The WPNewsman plugin saves the subscribers to the internal WordPress database.
Click on “Lists and Forms” under WPNewsman in your admin.
Click on “View Subscribers” under the list name.
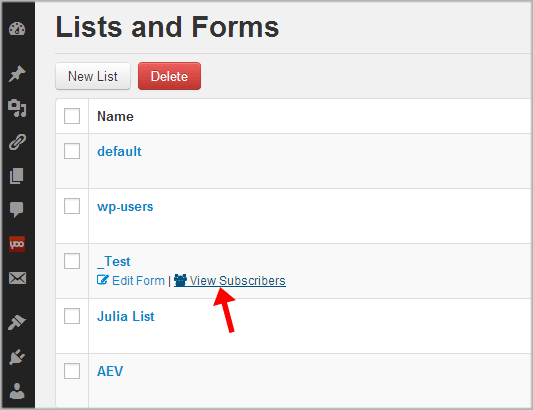
For you convenience you can choose to display only confirmed subscriptions, or unconfirmed subscriptions, or unsubscribed users on the list. Or click on “All Subscribers” to show all the users on the list.
You can search for subscribers, unsubscribe users, delete subscribers, import existing subscribers and export subscribers from your WordPress database to a file to use the list in your email marketing software.
To search subscribers:
- Type an email address (or a part of the email address) into the search field.
- Click “Search”.
The search (filter) engine will display the subscribers that satisfy the search criteria. If the list is filtered, all the features are applied to the filtered subscribers only.
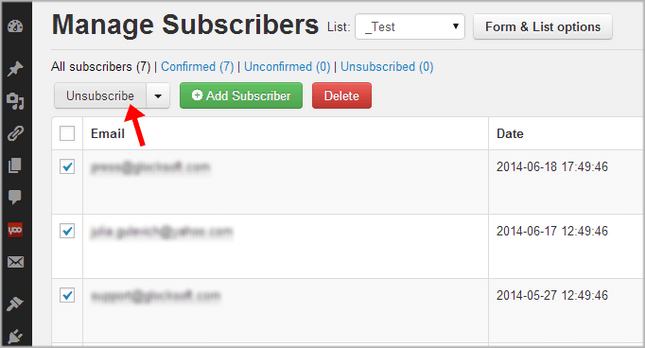
To unsubscribe users:
- Check the boxes near the email addresses you want to unsubscribe.
- Click “Unsubscribe”.
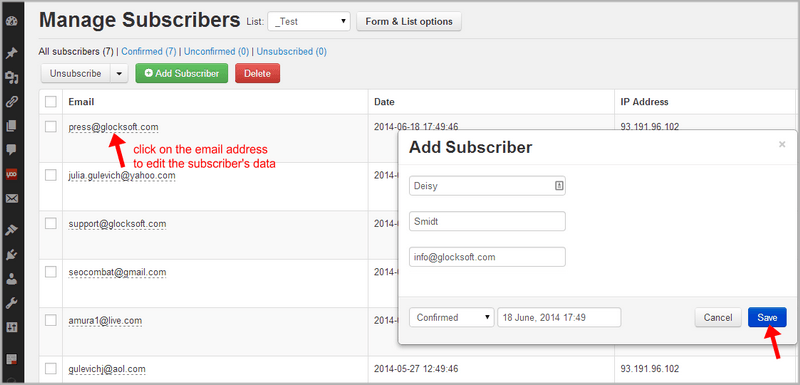
To change the subscriber’s data (email address, first name, last name etc.):
- Click the mouse on the email address.
- Type the new value(s).
- Click “Save”.
To delete subscribers:
- Check the boxes near the email addresses you want to delete.
- Click “Delete”.
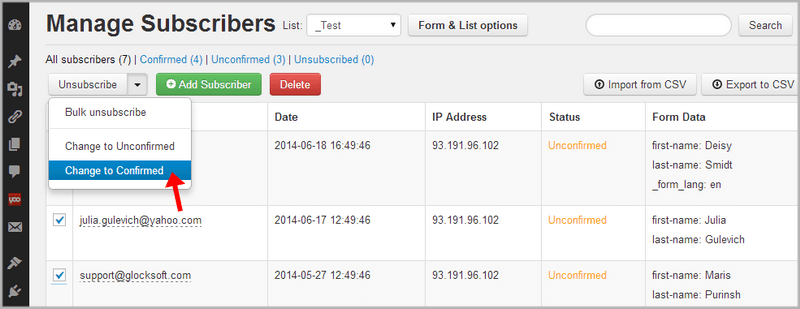
To change the subscriber’s status to Confirmed/Unconfirmed:
- Check the boxes next to the subscriber’s email address.
- Click the arrow in the “Unsubscribe” button.
- Click “Change to Unconfirmed” or “Change to Confirmed”.
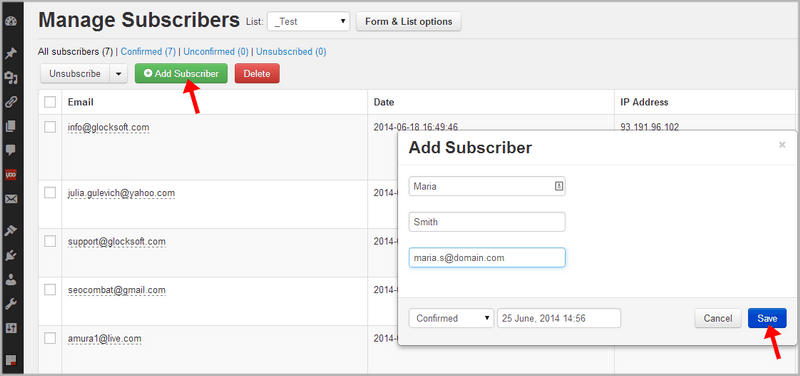
To add the subscriber manually:
- Click “Add Subscriber”.
- Enter the subscriber’s data. The form shows the fields you use in the subscription form associated with the current list.
- Click “Save”.
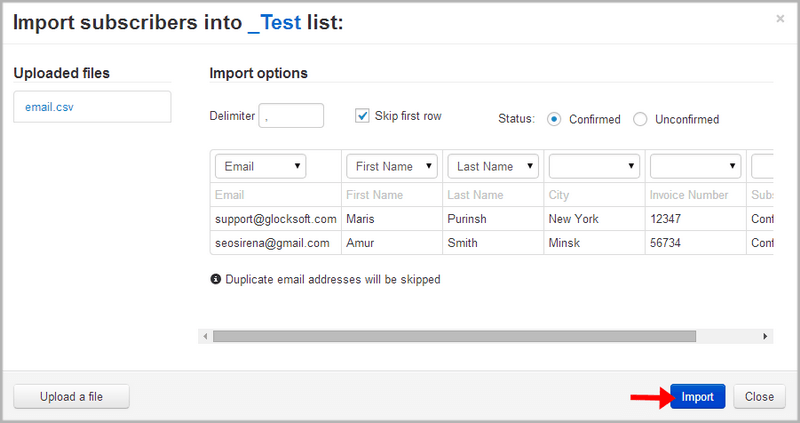
To import subscribers from a CSV file:
- Click “Import from CSV”.
- Click “Upload a file”.
- Select the file on the disk.
- Click on the file name.
- Setup the import options.
- Click “Import”.
If you transferred your subscribers from another email marketing service to WPNewsman or you simply have an old email list and want to clear it from inactive subscribers, it’s a good idea to ask users to re-subscribe to your list. You can even offer a reward for re-subscribing to make it clear to them the benefits of staying on your list!
To send the re-subscription request to “unconfirmed” users:
- Click on “Unconfirmed”.
- Click on “Send Request” button.
- 3. Select “Send Re-Subscribe Request” from the menu. This option sends the re-subscription request to ALL “unconfirmed” users on the list.
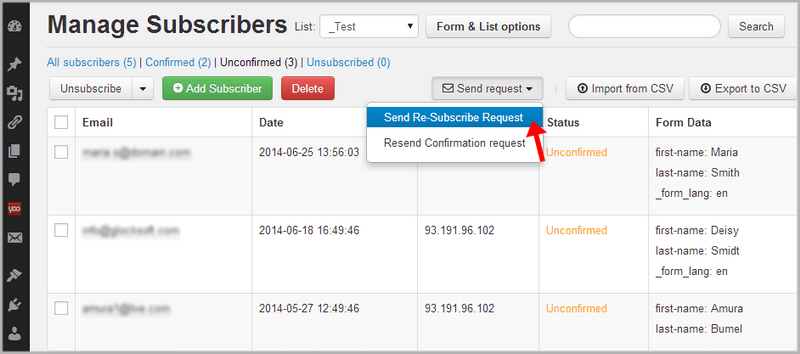
To re-send the subscription confirmation email to “unconfirmed” subscribers:
- Click on “Unconfirmed”
- Click on “Send Request” button.
- Select “Resend Confirmation Request” from the menu.
To export subscribers to a CSV file:
- Click “Export to CSV”.
- Type a file name.
- Click “Save”.
The exported CSV file will be included into a zip archive.