This tutorial describes how to use the Language Manager to translate G-Lock EasyMail interface into other languages. We used the translation to the French language as an example. It’s assumed that you’ve installed G-Lock EasyMail onto your computer already.
Download and Installation of the Language Manager
1. Download the Language Manager from this link http://www.glocksoft.net/.down/lmsetup.exe
2. Run the lmsetup.exe file to install the Language Manager
Loading Project for Translation
You will need to translate 6 files (projects):
EasyMail.ntv.lng (G-Lock EasyMail itself)
EMAdrBK.ntv.lng (Address Book)
DeliveryMonitor.ntv.lng (Delivery Monitor)
SentManager.ntv.lng (Sent Manager)
bc.ntv.lng (Bounced Manager)
splittest.ntv.lng (Split Tester)
The files are located in the Language folder in G-Lock EasyMail v6 directory:
…G-Lock SoftwareG-Lock EasyMail 6Language
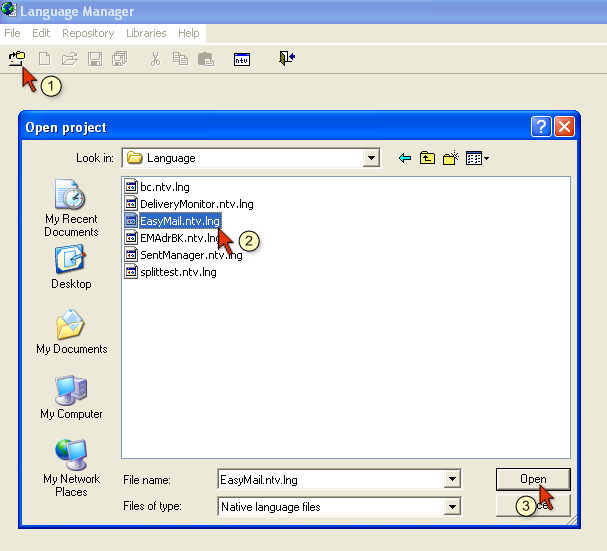
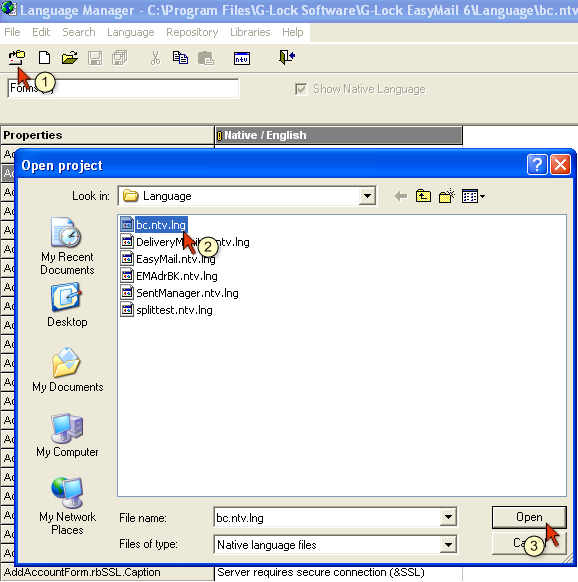
To load a project into the Language Manager:
1. Open the Language Manager
2. Click on Open Project
3. Browse the folders, locate the directory to which you installed G-Lock EasyMail v6 and open the Language folder
4. Select the native language file from the …G-Lock SoftwareG-Lock EasyMail 6Language folder
5. Click Open.
The project will be loaded into the Language Manager.
Note: The EasyMail.ntv.lng project must be translated the first to enable “Select language” option under G-Lock EasyMail ->Help menu.
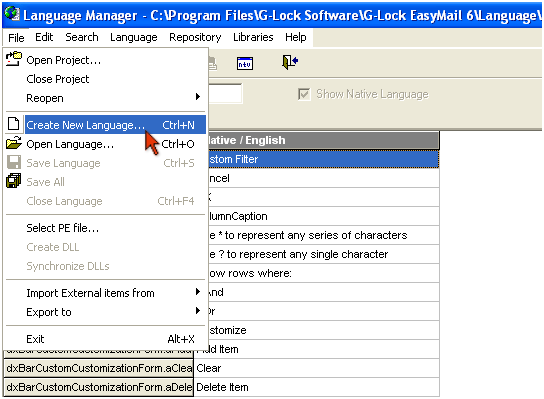
Adding Language
1. Click on the File menu
2. Select Create New Language
3. Select your language
4. Click OK
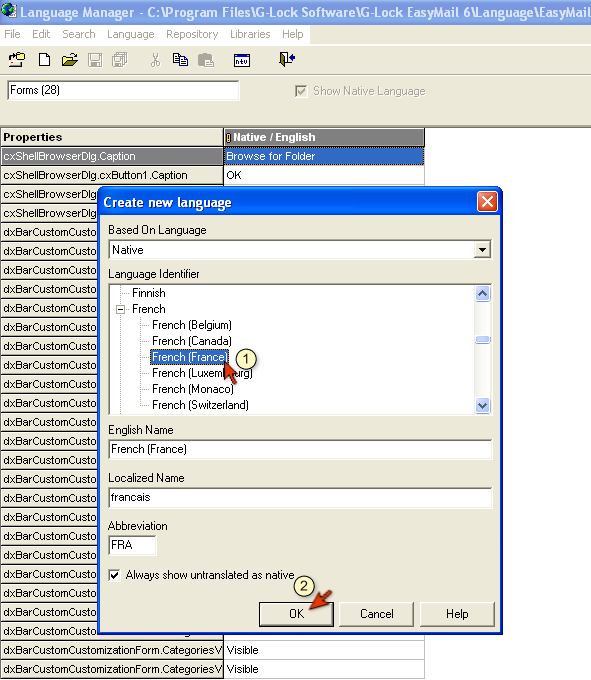
Your language will be added to the project.
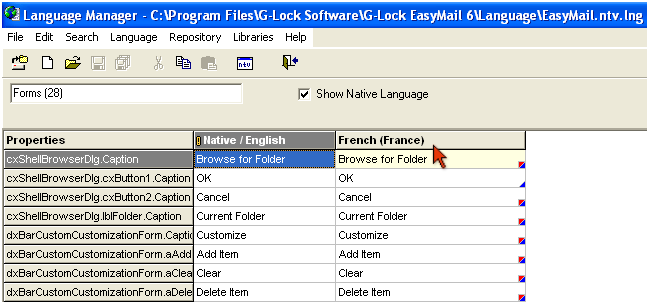
Translating Project
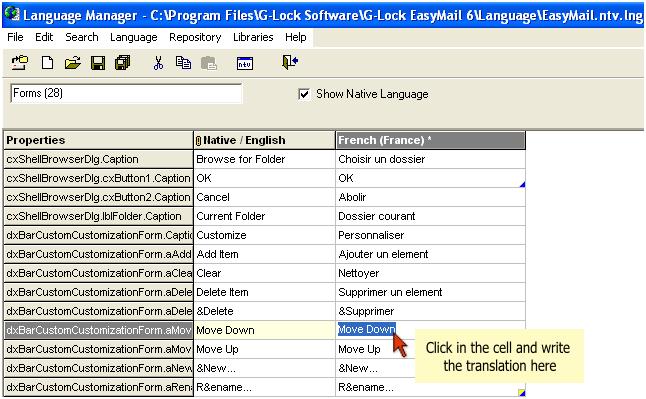
1. Select a cell in the column with your language
2. Click the mouse on the cell to make it available for editing
3. Type the translation to your language instead of the English text
Note: Do not delete the & characters in the translated text. The & character should be attached to the letter that follows it. For example, in the phrase “&Large icons” & is attached to the L letter. So, the translation should be written like
&Large icons -> Icones &larges
If there is no appropriate letter in the translated phrase, so leave the & character whenever you want in the phrase.
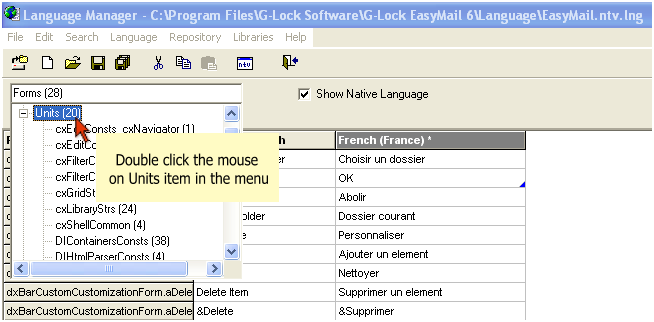
Each project contains Forms and Units items. By default the project loads Forms. After you translate all the Forms items, click the mouse in the field under the Language Manager toolbar, select Units and double click the mouse on Units.
The Units items of the project will be loaded.
Translate the Units items just like the Forms items.
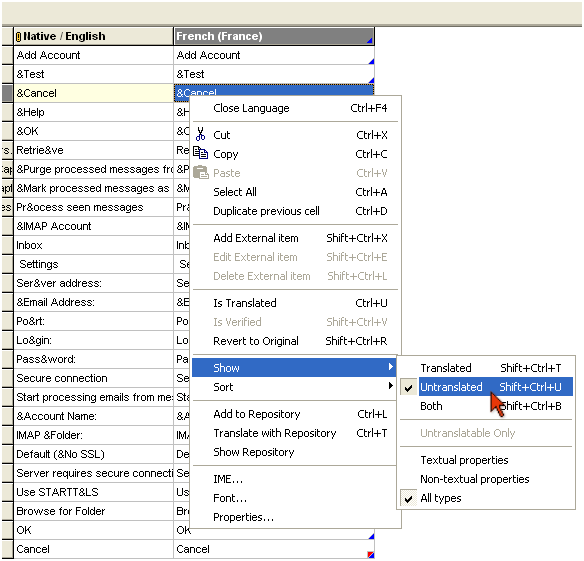
After the translation of the Forms and Units is complete, verify whether all the items are translated. To do this:
1. Select Forms in the top field
2. Click the right mouse button on the right panel with your language
3. Select Show -> Untranslated
The Language Manager will show all the untranslated items under Forms. If there are any items, translate them.
Then verify the Units for untranslated items.
Adding Translated Items to Repository
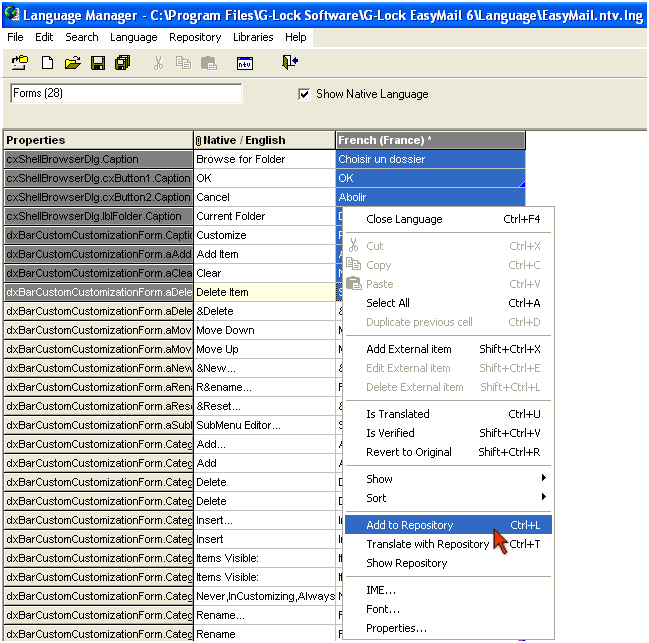
After you translate all the Forms/Units items, we recommend that you add them to the repository for further usage in the next project.
1. Select a cell in your language column
2. Press Ctrl+A on the keyboard to select all the cells in the column
3. Click the right mouse button on the selected items
4. Select Add to Repository from the menu
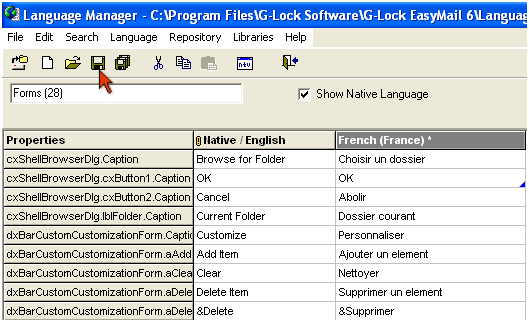
Saving Translated Project
Click Save on the Language Manager toolbar to save the translated project to a file.
The project will be saved to a file with the [language].lng extension, for example, EasyMail.FRA.lng.
Loading Next Project
After the translation of the EasyMail.ntv.lng project is complete and saved to a file, you can load the next project for translation.
1. Click on Open Project
2. Select another .ntv.lng file, for example, bc.ntv.lng
3. Click Open
The new project will be loaded.
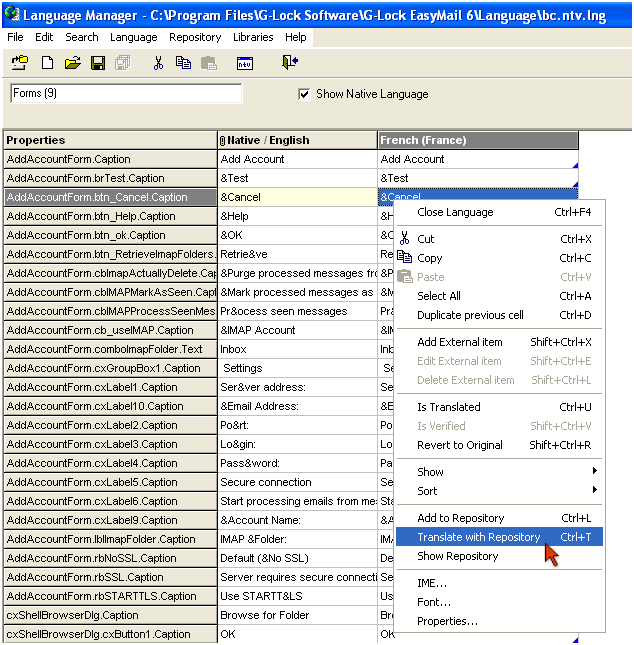
For your convenience you can load the translated items from the repository into this project.
1. Click the right mouse button on the cell in the column with your language
2. Select Translate with Repository from the menu
If this project contains the items that are already translated into your language, the Language Manager will load the translation from the repository.
Translate the Forms and Units items in this project, verify the translation by showing Untranslated items, save the project and load the next project for translation.
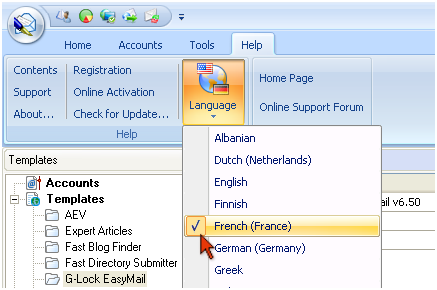
When the translation of 6 projects – EasyMail.ntv.lng, EMAdrBK.ntv.lng, DeliveryMonitor.ntv.lng, SentManager.ntv.lng, BC.ntv.lng, and splittest.ntv.lng – is complete, you can see how G-Lock EasyMail interface looks in your language. To do this:
1. Open G-Lock EasyMail
2. Click Help -> Language
3. Select your language from the menu
Sending Translated Projects to G-Lock Software
To send the translated files to us:
1. Open the Language folder in G-Lock EasyMail 6 directory
2. Copy 6 files with your translation. For example: EMAdrBK.FRA.lng, DeliveryMonitor.FRA.lng, SentManager.FRA.lng, BC.FRA.lng, EasyMail.FRA.lng, and splittest.FRA.lng. In your case the files will have the .[your language].lng extension.
3. Attach the files to an email message and send them to us at support@glocksoft.com.
Thank you for your cooperation.
G-Lock Software Team