How to Import Contacts from CSV File
If you have the contacts stored in a file, you can use the Import Wizard to import them into a group in G-Lock EasyMail address book. Using the Import Wizard you can import the contact information from Paradox, DBase, Text, CSV, HTML, MS Excel, MS Word, Lotus 1-2-3, QuattroPro, XML, MS Access Database, ADO connection, DBISAM table, and Clarion table files.
Here is our tutorial how you can import the contacts from a CSV file into G-Lock EasyMail:
- Open G-Lock EasyMail address book
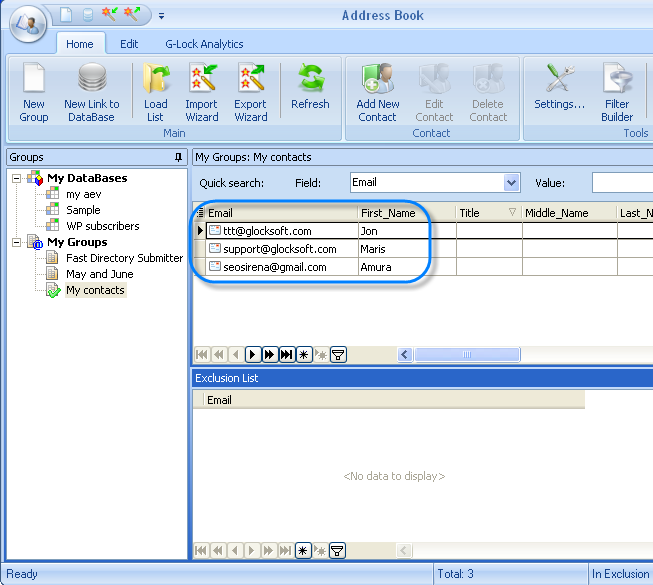
- Select the group in My Groups section
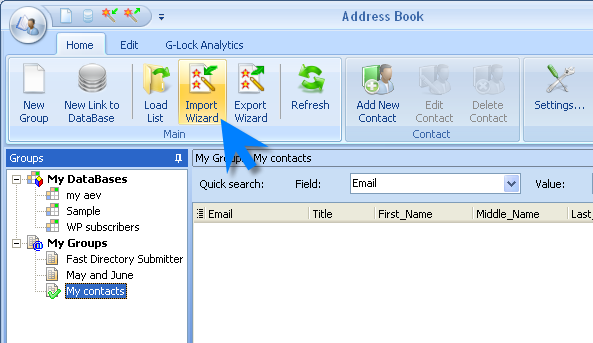
- Click on the Home menu
- Click on Import Wizard
- Follow the steps of the Import Wizard
Step 1. Select the file type – Text and CSV files. Click Next.

Step 2. Select your CSV file on the disk. Click Next.

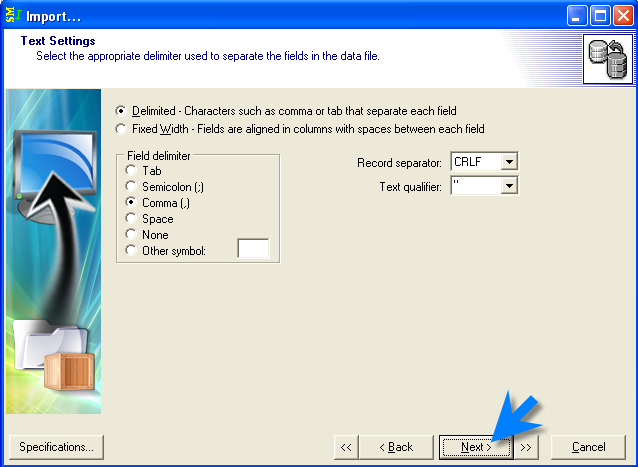
Step 3. Select the delimiter option – Characters such as comma or tab separate each field. Click Next.
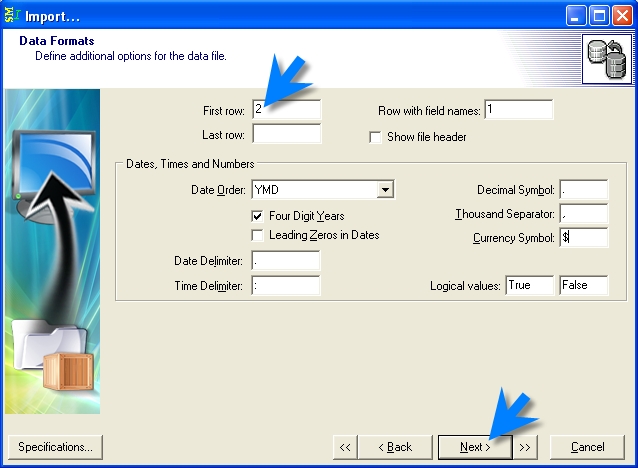
Step 4. Type 2 in the First row field to start importing from the 2nd row because the first line in your CSV file will contain the field titles. Leave the Last row field empty if you want to import all the contacts from the file. If you want to import a specific number of rows, type the number of rows in the Last row field, for example 50. If, enter 2 in the First row field.
Click Next.
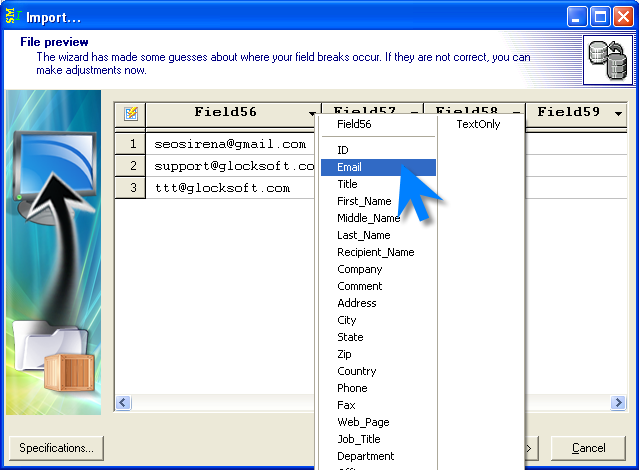
Step 5. Click a black down arrow in a field heading and select the appropriate field name from the menu. For example, the field that contains the email addresses must be titled Email instead of Field56, the field that contains the contacts’ first names must be titled First_Name and so on. Map all the fields that you want to import into G-Lock EasyMail.
When done click Next.
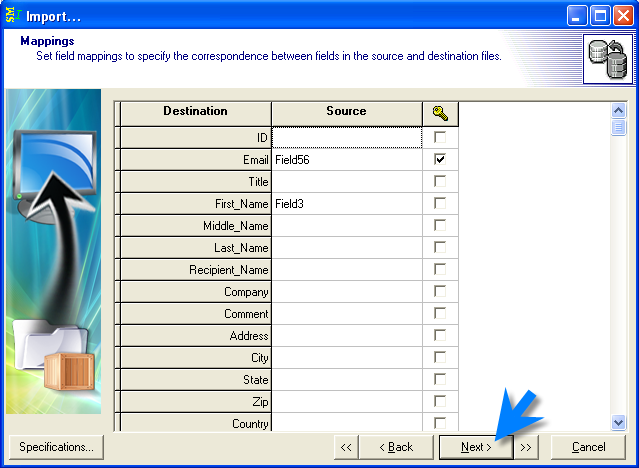
Step 6. Check if the field mapping was done correctly. The fields in the Destination are fields in G-Lock EasyMail address book. The fields in the Source are fields in your CSV file.
If everything is correct, click Next.
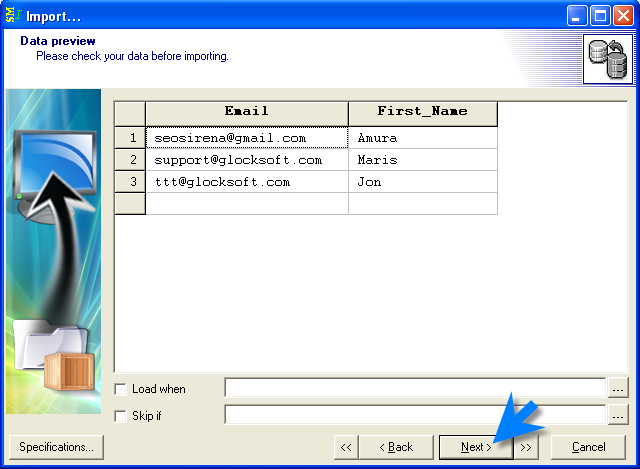
Step 7. Preview how your contacts will be imported into G-Lock EasyMail Address Book. Click Next.
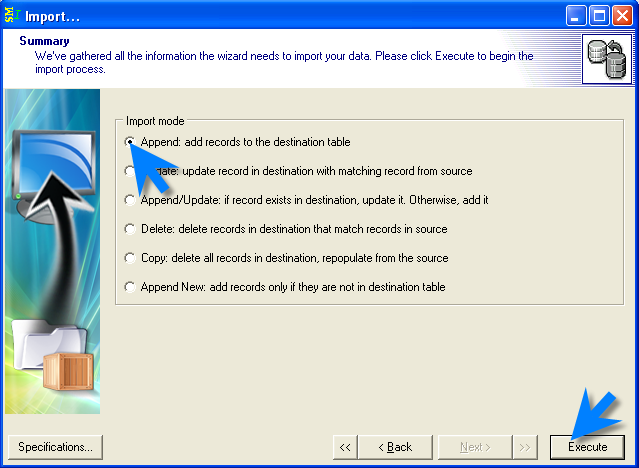
Step 8. Select the import mode – Append: add records to the destination table. Click Execute.
It’s done. Your contacts are imported into G-Lock EasyMail Address Book. Now you can setup an account, create an email newsletter and send it to your contacts.